Blog Shop Challenges Swaps Website

Saturday, June 2, 2012

June's 100 Cricut cartridge blog hop Day ONE


My Cricut Craft Room 100 Cartridge Hop


Welcome to my project for today's Blog Hop!

Don't forget to stop back tomorrow to see what I made with 2 brand new Bo Bunny paper collects and that is also today's giveaway....


In this first picture I used Pretty Pennants and cut them at 2 3/4"

I used Creative Memories Divine Wedding for the letters in them. I designed this with Cricut's Craft Room to get the letters right where I wanted it. I used an older Bo Bunny Collection of papers called Paradise.

Tomorrow my project will show you Bo Bunny Camp-a-Lot and Little Miss collections.

That is also this weekend's Blog Candy (giveaway)


On the left striped paper I used the Skyward Set of Cuttlebug embossing folders then I turned the paper over and inked the noh-embossed parts. So the actual embossing does not have ink, I did the parts around it.


Make sure that you commented on ALL of today's blog to win the Big Bo Bunny prize pack!


Here is the entire line up in case you get lost...

Start http://mycricutcraftroom.blogspot.com


Saturday, May 5, 2012

May's 100 Cricut Cartridge Blog Hop

My Cricut Craft Room 100 Cartridge Hop

Thank you for visiting all of the blogs today. Don't forget to comment on the blogs to win the Cricut Wild Card 2 Cartridge....

I went home sick from the shop and my cards are there, but here is a digital peek at it. I will show it and my dog book tomorrow... I am so sorry. Here is my CCR file and what it looks like....


There are great sales in the store today and all of the newest cartridges are only $32 or $20!!!


Next please visit Miranda's Blog

In case you need to visit any of the blogs today, here they are
Tomorrow will be all new blogs and all new projects!


Sunday, April 22, 2012

Testing again


I am testing this to see if it will post properly. It might take a few tries to get this right....

https://skydrive.live.com/redir.aspx?cid=4a2d23d8b55076c5&resid=4A2D23D8B55076C5!108&parid=4A2D23D8B55076C5!105&authkey=!ALv2z64Xvle8UvA

https://skydrive.live.com/redir.aspx?cid=4a2d23d8b55076c5&resid=4A2D23D8B55076C5!107&parid=4A2D23D8B55076C5!105&authkey=!AGRWkAuKNIESH-8

If you are not able to download it here is the complete list.

Posting Current Cricut Cartridge list

This is a test to see if I can correctly post my Word and Excel documents so you can just download items instead of having me email them to you. In a super busy day sometimes it is hard to find time to email files.... so here it goes....

Here is the current Cartridge list updated in both Microsoft Excel and Microsoft Word


Sunday, April 8, 2012

April's 100 Cricut Cartridge Blog Hop- Day TWO

Thank you for joining us on Easter sunday for a little hop!

I made this cute card for Easter today! I hope you like it!
I still cannot add links....Hoping to get it fixed soon

Don't forget to comment along the way to be entered to win the over 20 prizes this weekend, comment on ALL of the blogs. I will be picking some winners from the comments on all of the blogs along the way... not just mine :)

Here is what I started to make last night.... then "Life happened" which means my family changed my plans... but it was a welcome change....
I was making this card then we somehow got to decorating eggs and then my assistant helped me with this card....


WARNING........
This was created by a 4 year old with my assistance....
Family... That's what it's all about


I used the Teresa Collin Sampler Cricut Craft Room Exclusive cartridge to make this card, I welded two of the same image together to make the card then I resized one of them to be the brown base. Then I made sure the "Waffle" print would fit into the brown card layer.
This was how I added the image to the card. There were such thin little pieces that I had to be so careful every time I touched the paper it ripped so I used the transfer paper to transfer my design to the paper.


I ran the design through my 510 Xyron sticker maker to get adhesive in each
and every inch of the design.

Here is the lovely card "Ala Bella"
I also used Spring Cottage for the gate. 2 3/4" for the gate
I used Easter magic for the bunny and the eggs cut at 1" and for the bunny the Teresa Collins Bunny Basket CCR cartridge cut at 2"


This was how I ended my night and my project.... we colored eggs and made Bunny cookies...


Here was the base layer of my images I chalked the edges....
but it was all covered up with glitter by the time my little one finished "helping" me.


Here is the line up....
Next you should go to Miranda's Blog


1. Start My Cricut Craft Room http://mycricutcraftroom.blogspot.com/
24. Erica’s Blog candy http://ericasblogcandy.blogspot.com/


Saturday, April 7, 2012

My Cricut Craft Room's 100 Cricut Cartridge Blog Hop Day ONE

Welcome to my project for the hop....
After hours of issues with blogger.... still having issues but at least I can add my photos now.


I made this card using Birthday Bash. I cut the actual card at 8, 7, 6, 5, and 4"
I then lined them up in the middle and then trimmed the sides so it would be even on both sides. After using all of my pretty paper.... I did not like the card with the sides the same. So I ended up matting it on the purple diamond paper and then on the pink and purple argyle paper. All of the papers are Best Creation, including the glitter paper. The collection is called Ballet Princess.
I also cut the phrase from Birthday Bash at 3" and the balloons at 3 1/2"

I used Paper Dolls Teen Scene for the girl and cut her at 4"

The presents at the bottom were actually stickers and I used Lavender, Thistle and Aqua stickles to pull all of the papers, glitters and colors together.
I also used Turquoise Gem Versa Magic ink and Pearlescent Purple Brilliance ink.


Here is the inside of the card and I intentionally put the paper like this on the inside. I thought it would make the inside pretty and pull the whole project together... Like I say pretty projects start with pretty papers.

I also used Jillibean Soup Pink and Purple Twine and I used Royal Twine from
The Scrapbooking Queen and used the Turquoise Gem Versa Magic ink to color the twine a little bit more to be a perfect match for my project.

The purple bling is from the dollar section at Target.

I also used a brad to secure the twine under the presents then I put adhesive on the back of layer one of the card to hold the twine in place. After it was all in place I added the next layer of paper. So each layer masked the layer before and then from inside to out every side and every edge was finished.


I used my Zutter Corner rounder to round all of my edges.

So here is my cute little card fit for any
Royal occasion in honor of today's sponsor and her Birthday!


Next you should go to.... Dana's Blog
Here is also the link in case you cannot click on it
http://danascraftycorner.blogspot.com


Saturday, March 31, 2012

Easter Bunny Hop DAY ONE


Thank you for hopping along with us today....

You should have come from Janet's bog, if not please start from the beginning

I do hope you will come back tomorrow to see 10 new projects from the same people as today. 

Comment here to be entered to win the I-top 2.0 Bundle which includes
The I-top 2.0
The 34mm I-top punch
The 34mm head for the I-top 
And some additional brads so you can make your own....
Tomorrow you will see what I made with the I-top


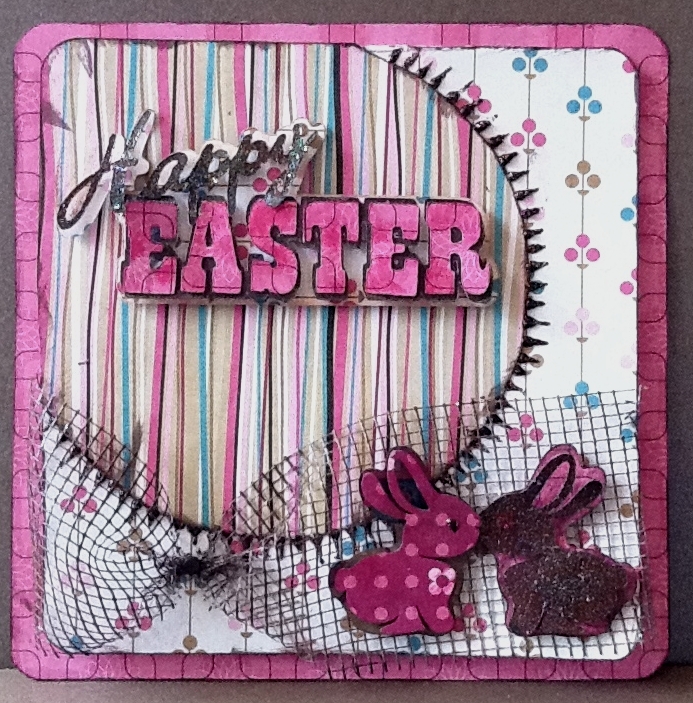
I made this using Easter Magic, Cricut Craft Room Exclusive Cartridge.
I cut the bunnies and the sentiment at 2"
I used Bo Bunny Sweet Tooth paper for this.
The mesh at the bottom is something I have had forever and it seemed perfect for this. We all had to make a 3-D element in our project AND a bunny! So the mesh is sticky on one side, but you can pick it up and move it if you don't like it and it will not harm the paper. This was brown but not dark enough so I used the same ink that I did on the edges of my card. It is Momento Rich Cocoa, one of my crafting staples.... What would I do without my little Dew Drop inks?!?! 
I also used VersaMagic Jumbo Java and Rose Bud Momento Ink.  I cut the circle freehand and then inked the edges. I also use the Round it all by Zutter to round my corners. I also used Cinnamon Stickles for the 'sun burst' effect around the circle. I used used a little brad to gather the mesh and to keep it attached to the paper. The inside of the card was lined with matching paper AFTER I stuck the brad through it. So no one will see my brad or the mesh from the inside of the card!

Make sure you come back tomorrow to see my next project.... 
when my Bunny grows up :) 


Next you should go to Janet S. blog 


If you missed any blogs along the way please go back and comment to be entered to win the I-top....
The Easter Bunny just might have a few surprises to give away on the other blogs. All winners announced on Tuesday on my regular blog... http://mycricutcraftoom.blogspot.com 


6. Erica http://ericasprojects.blogspot.com/  >>>>you are here<<<<<